Gmail to Gmail Mail Transfer – #3 Stages of Exporting Emails
Whether you want to export emails from your personal account or work account, Gmail to Gmail mail transfer is an important process.
Emails hold importance in your daily lie because they consist of a lot of information.
This information doesn’t necessarily have to be related to work.
Some may be personal, some may be related to your studies, some may hold important conversations.
Thus, keeping them safe at all times is a priority for most of the users worldwide.
Let’s check out a user query to understand the type of situations users face.
Query: Hi! I have created a new Gmail account and I wanted to know about the steps to transfer Gmail emails to another Gmail. I had an incident where a hacker tried to get into my account, fortunately, they couldn’t. But I cannot have that risk again. So I would much rather have my emails in another account as backup. Please suggest something! Open for software suggestions too.
There are cases where hackers may have gotten into someone’s account and are now scared of losing their data.
So, in situations like these, having your emails in another account is also a great option to keep them safe.
Let’s understand other types of situations that you might face.
Situations Causing Users to Learn Gmail to Gmail Mail Transfer
Users may face the following situations:
- When switching companies, there may be a possibility that you need to transfer your data to another Gmail account.
- Users who have faced virus and malware attacks in the past might want to export their data to another account to keep it safe.
- Some users only create another account to keep their emails as a backup and access it only when required.
- Many users keep different accounts for personal and professional uses. However, some transfer their work emails to their personal email address for safety.
Majorly every reason to transfer Gmail emails to another Gmail revolves around keeping the data safe.
Even though Gmail has a very strong security system, the cloud is never 100% safe from attacks.
Now, there are three stages of moving your data.
Stage 1 – Enabling POP for Configuring Your Old Account
To start with the steps, you need to first configure POP:
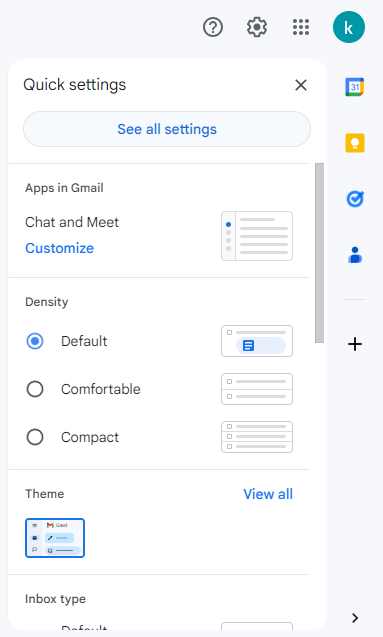
1. In your Gmail account, click on the Settings gear and choose the See All Settings option.
2. When the Settings window opens, go to the Forwarding and IMAP/POP section to start the process of Gmail to Gmail mail transfer.
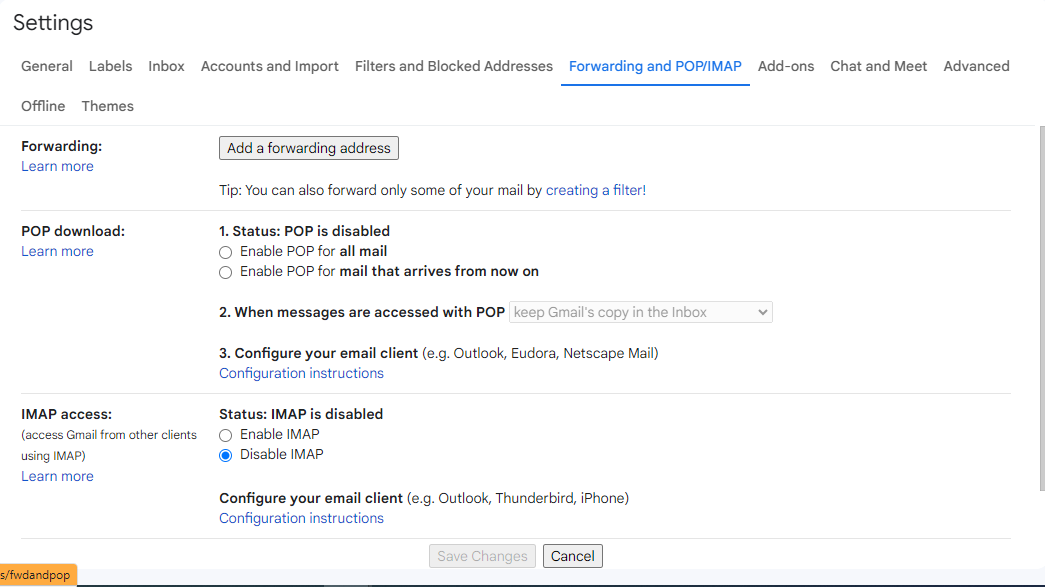
3. From the POP Download section, click on the Enable POP for all mail radio button to enable it.

4. Here, you can choose the Archive Gmail’s copy option if you want to clear your account’s inbox.
5. You also have the option to remove all the emails instead of copying them by choosing the Delete Gmail’s copy option.
6. Or, select Keep Gmail’s copy option to leave the messages as they are.
7. Finally, hit the Save Changes button.

This is the first stage of the process.
Stage 2 – Fetch the Emails in New Account to Transfer Gmail Emails to Another Gmail
Do the following in this stage:
1. Log in to your new account and go to Settings → See All Settings.

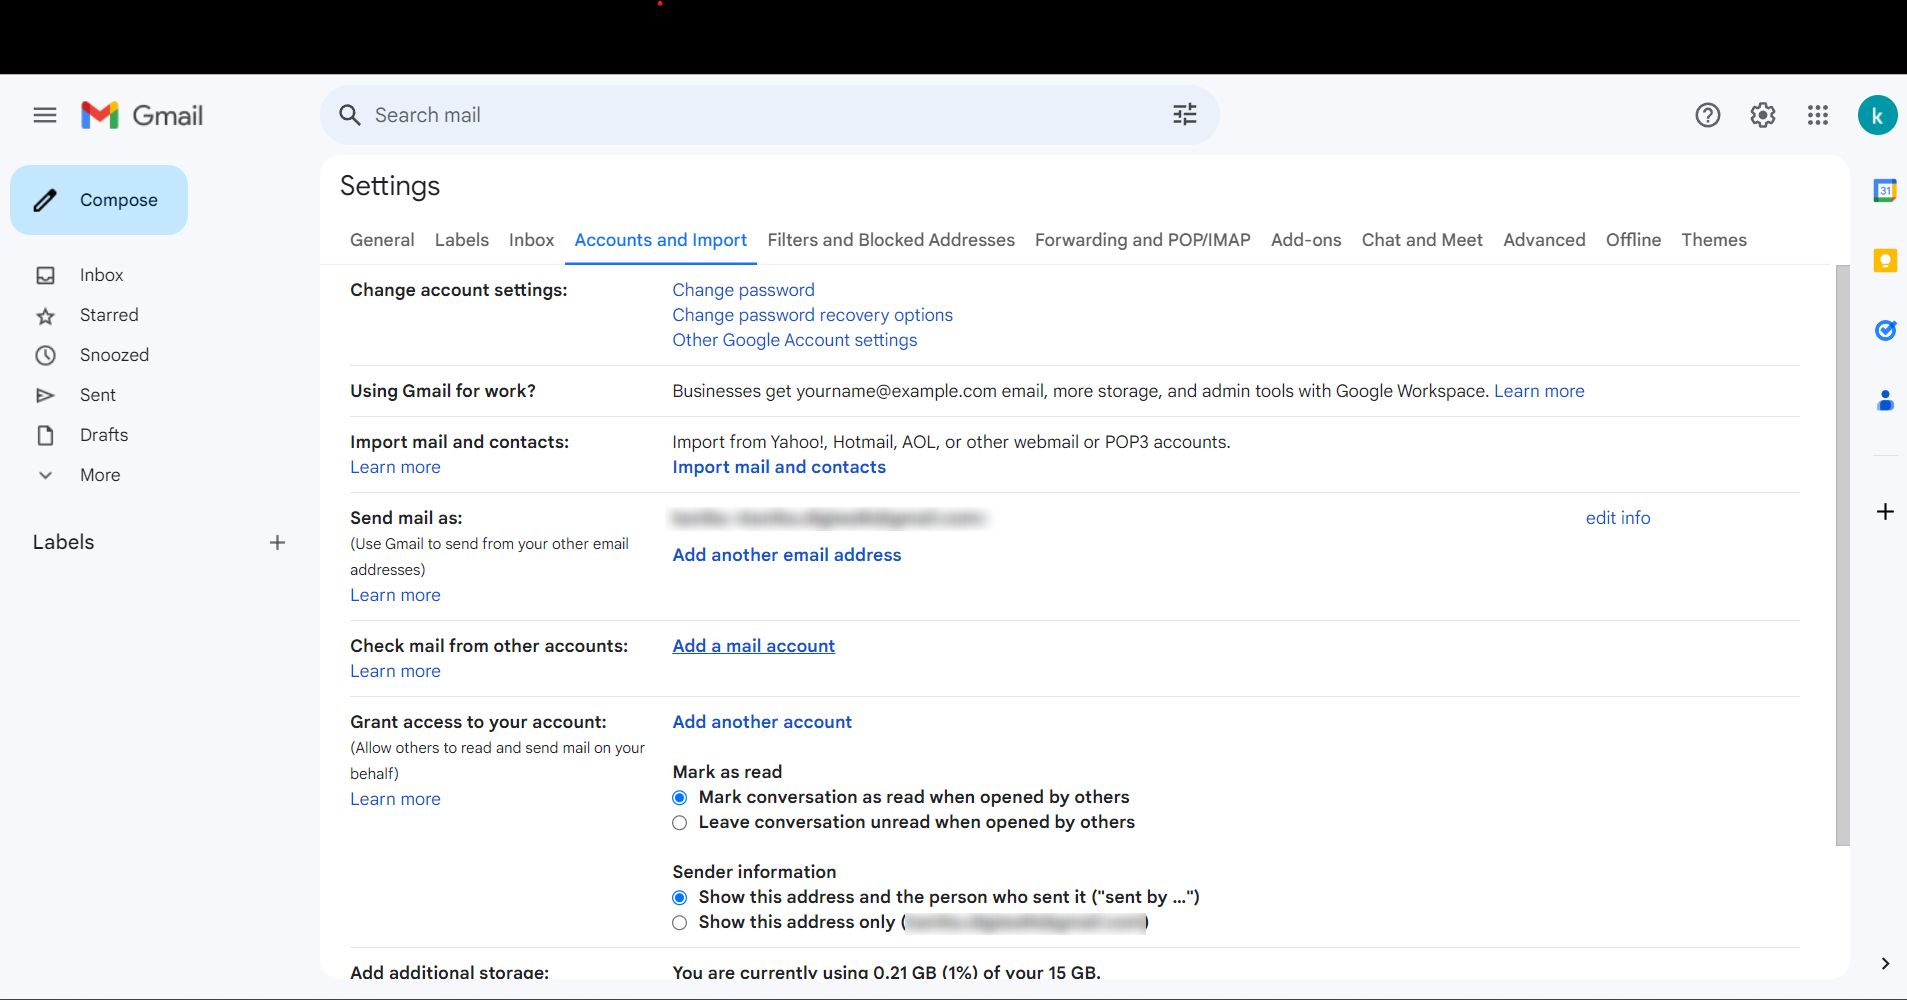
2. Go to Accounts and Import → Check Mail from Other Accounts → Add a Mail Account.
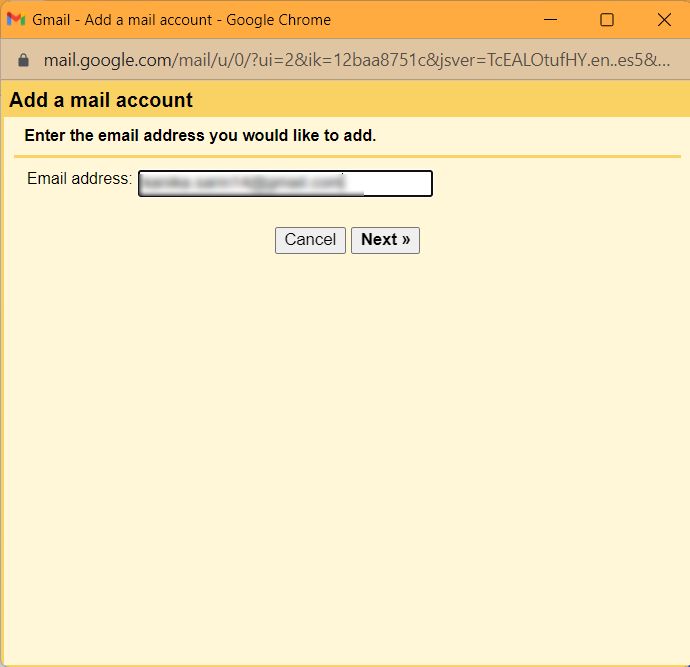
3. Here, provide the email address to transfer the emails to and hit Next.
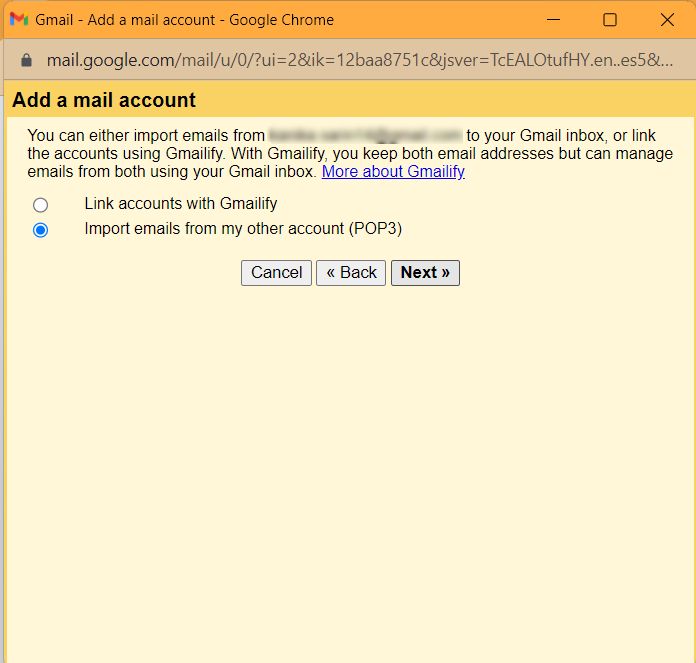
4. Choose the option Import Emails from my other account (POP3).
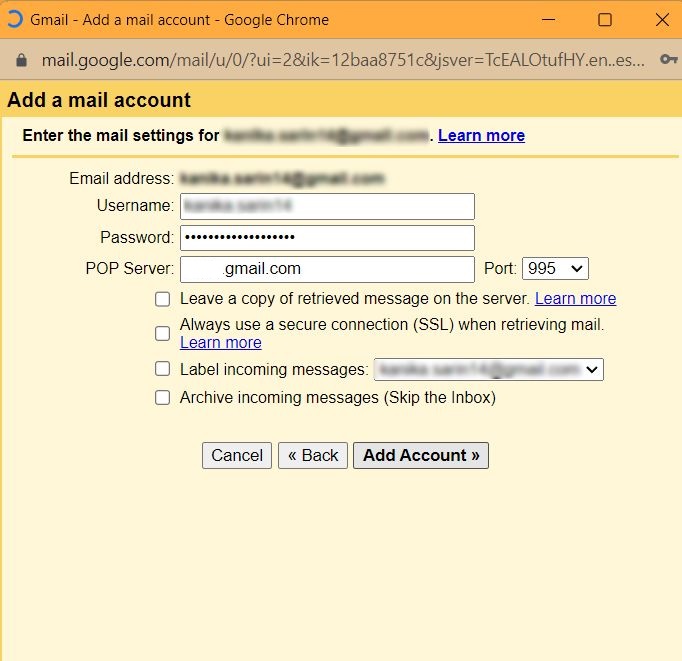
5. Now, enter the password of the email address you are importing from.
6. Select pop.gmail.com from the menu of POP Server.
7. Click on the Port No. and choose 995.
8. Change other settings as required and hit Add Account.
Stage 3 – Configure the Accounts for Gmail to Gmail Mail Transfer
Now, we will make both of the accounts recognize each other. This is in continuation of the second stage. After hitting Add Account, follow these steps:
1. Click on the Yes, I want to be able to send mail as (email address) option. Press Next.
2. Now, enter your name and check mark the box beside Treat as an alias option.
3. Hit the Next Step button twice and choose the Send Verification option.
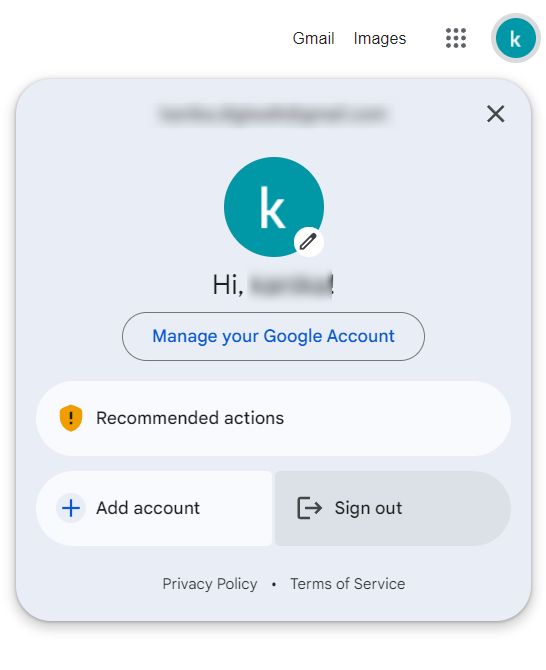
4. Go to the Account Icon on your Google Window and choose Sign Out.
5. Further, to transfer Gmail emails to another Gmail, sign in with the other account.
6. Copy the code that you have received and log in to your first account.
7. Again, go to Settings → See All Settings.

8. Select Accounts and Import → Send mail as → Verify.
9. Enter the verification code in the window that opens and click on Verify.
Your emails will start moving. This method does not transfer all the emails in a single go.
It will take some time and the emails will be transferred in batches of 100-200 emails.
Typically, the Gmail to Gmail mail transfer starts exporting the oldest emails first and then comes to the latest emails.
All the emails will be transferred and shown in the same folders as in the old account. For example, the emails in the Sent Mail of the old account will be shown in the Sent Mail folder of the new account.
In case you want to stop the importing at any point, you just have to go to the account you are importing from (your old account).
Go to Settings → See All Settings → Accounts and Import → Check Mail from Other Accounts → Delete.
Preview of the Blog
The process for Gmail to Gmail mail transfer is a lengthy procedure and you should follow the steps carefully. Since there are no more manual methods, you need to first understand the process and then follow the steps.
There are various tools to export these emails as well, however, you may not be able to perform the process to completely transfer the emails for free.

