Plenty of users are looking for a way to upgrade or update Windows 10 to Windows 11 but are not sure how to do so. This is a guide that can help you to fulfill your requirements easily and for free.
If you still haven’t upgraded your Windows, this is your chance to. There are multiple ways to update your Windows which we are going to explain in this article.
Stick to the end of the blog to know all the information on how you can easily get an upgrade on your Windows.
Even though Windows 11 is a free upgrade for all the existing devices with Windows 10, there are a few requirements to meet to upgrade from Windows 10 to Windows 11.
In brief, you need to have an Intel 8th Gen or new, Qualcomm 7 and 8 Series processor, or AMD Zen 2 or new. Apart from this, you need to have TPM 2.0, minimum storage of 64GB and Secure Boot.
If you meet these requirements, you will get a notification for the upgrade.
Microsoft is providing support to various upgrade paths to the new version of Windows so it may be easier to update.
If not, there are other methods to perform the same task which we are going to teach you here.
Jumping into it!
Update Windows 10 to Windows 11 with the Windows Update Option
To use this method, you can follow these steps:
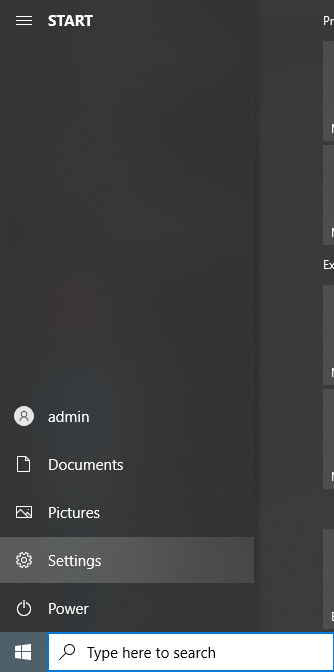
1. Click on Start or Windows button and open Settings.
2. Choose the Update & Security option.

3. Select Windows Update.
4. Click on the Check for Updates button.

5. Press the Download and Install option.
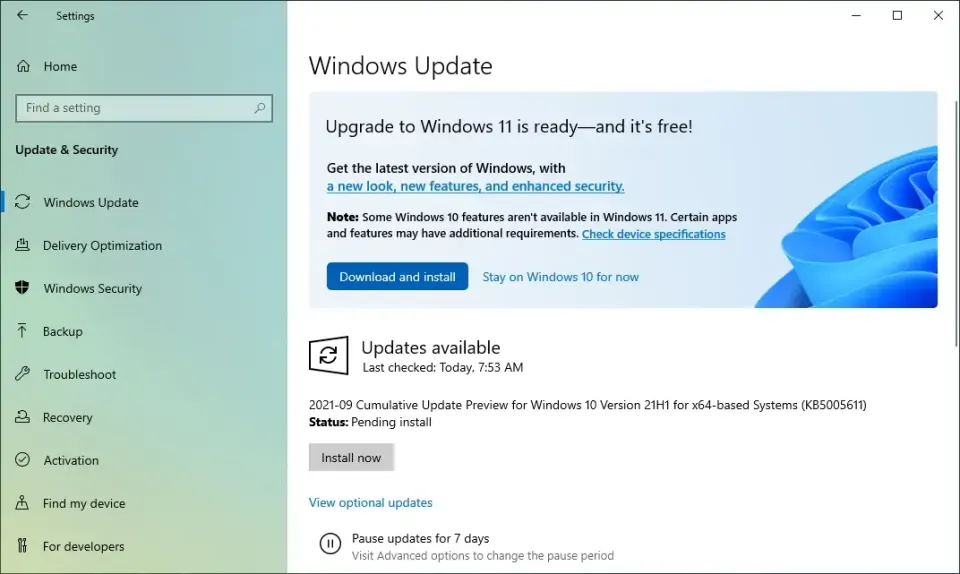
6. Hit Restart Now.
This is how you can simply upgrade your Windows.
If you don’t have an update available, you can use the ISO file to upgrade.
Upgrade Windows Using the ISO File Method
To upgrade from Windows 10 to Windows 11, you can:
1. Start by opening the Microsoft Support website.
2. Then, you can go to the Download Windows 11 Disk Image (ISO) option and choose Windows 11.
3. Press the Download button.
4. Choose the language for installation.
5. Hit Confirm.
6. Click on Download to save the ISO file on your device.
7. Right-click on the ISO file and choose the Open With extended menu. Select Windows Explorer.
8. Now, from the left panel, click on the mounted drive.
9. Begin the process to update Windows 10 to Windows 11 by double-clicking on the Setup file.
10. After that, click on the Change how Windows Setup downloads update button. (Optional)
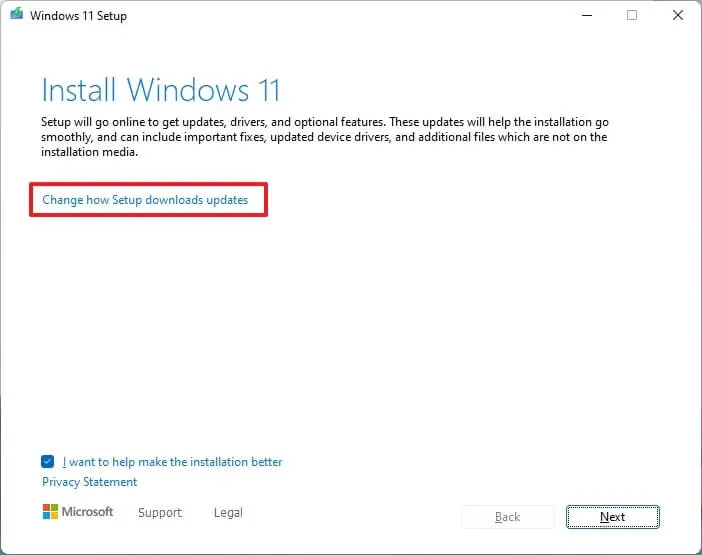
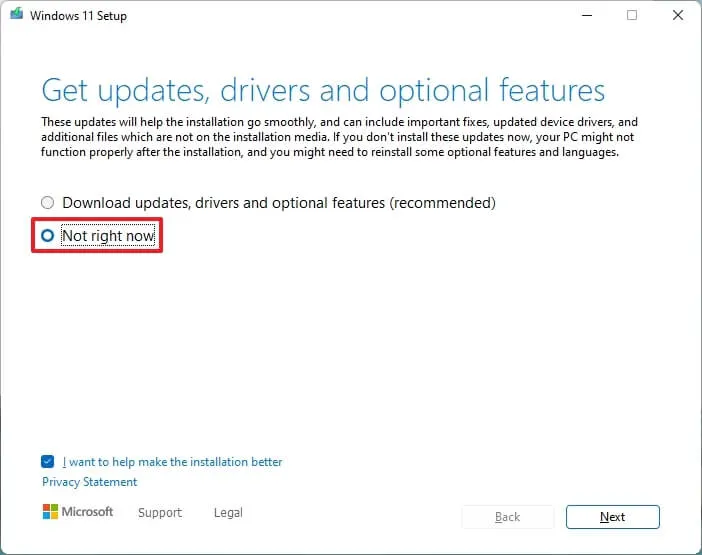
11. Here, click on the Not Right Now button and hit Next.
12. Finally, hit the Accept button to agree to the terms and conditions.
13. Hit Install to start the upgrade.
If you want a clean installation, go to the Change what to keep option and choose the Nothing button. Press Next and hit Install.
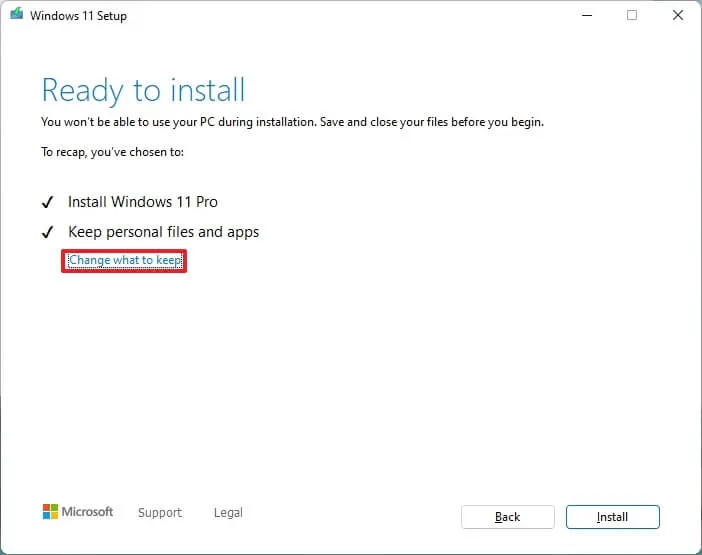
The computer restarts during the process a few times. After it is completed, most of the settings, files, and apps migrate automatically.
Upgrade from Windows 10 to Windows 11 Using the Installation Assistant
If you don’t find the above-mentioned technique feasible, you can always use the Installation Assistant. Since the Media Creation Tool no longer works for in-place upgrades, Installation Assistant is your best shot here.
Apply these steps:
1. Go to the Microsoft Support website.
2. From the Windows 11 Installation Assistant segment, choose Download Now.
3. Launch the tool by double-clicking on the Windows11InstallationAssistant.exe file.
4. Now, click on the Accept and Install option.
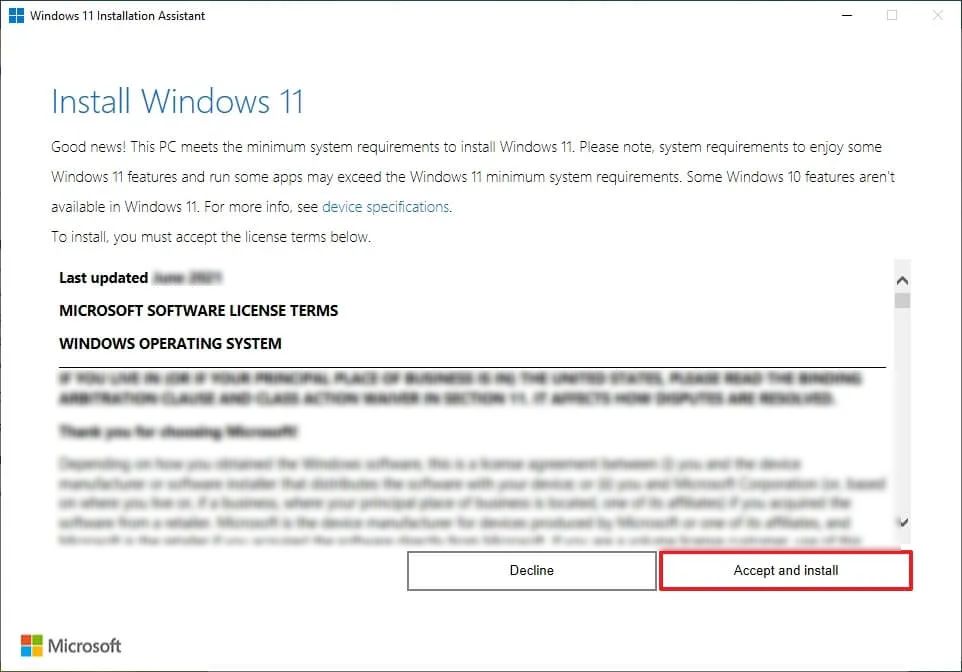
The installation will start. As soon as it is completed, your computer will start setting up according to the new release of the OS.
Update Windows 10 to Windows 11 With the Insider Program
If you are thinking about testing the upcoming releases, simply enroll your computer in the Dev Channel.
For the same, implement these steps:
1. Open the Settings menu by clicking on the Start button.

2. Go to Update & Security.
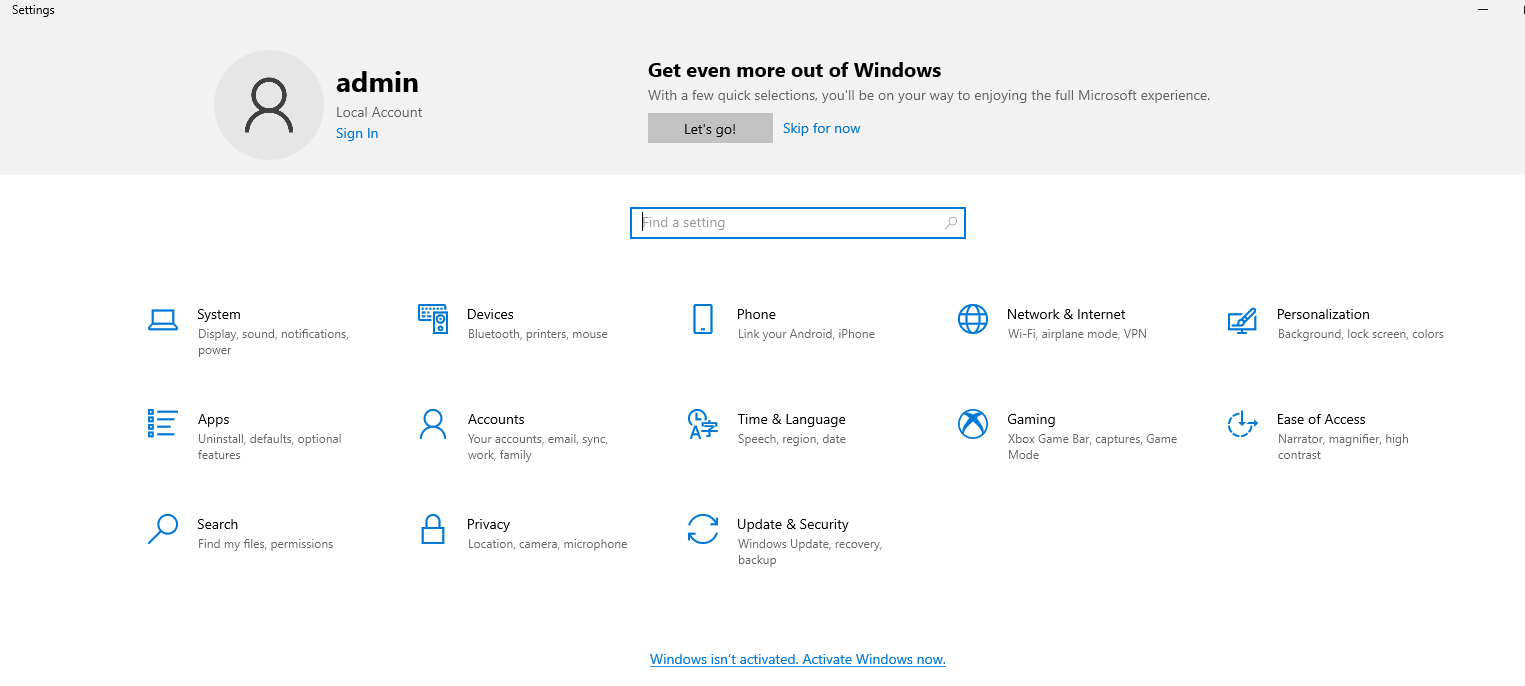
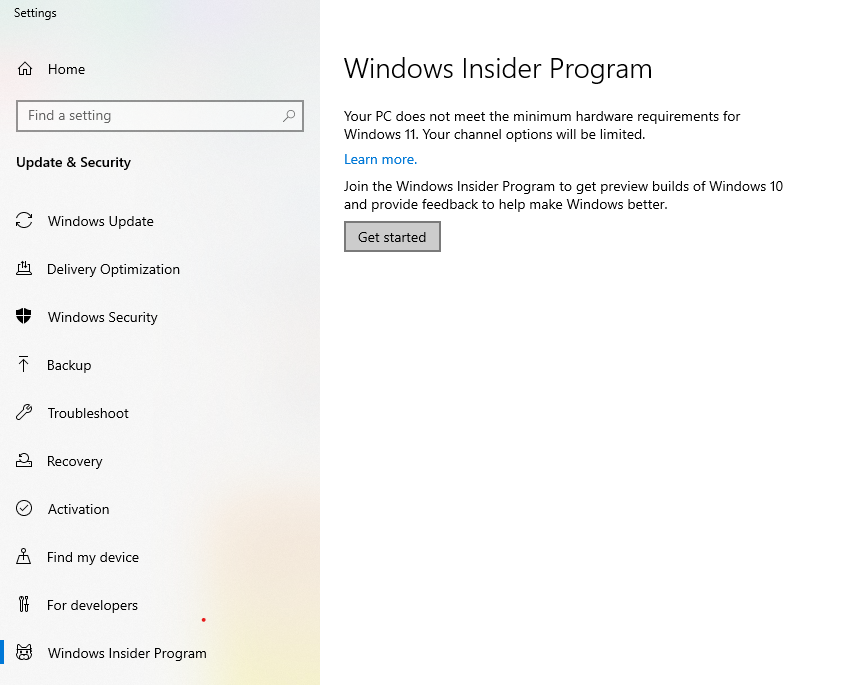
3. Select Windows Insider Program and hit Get Started.
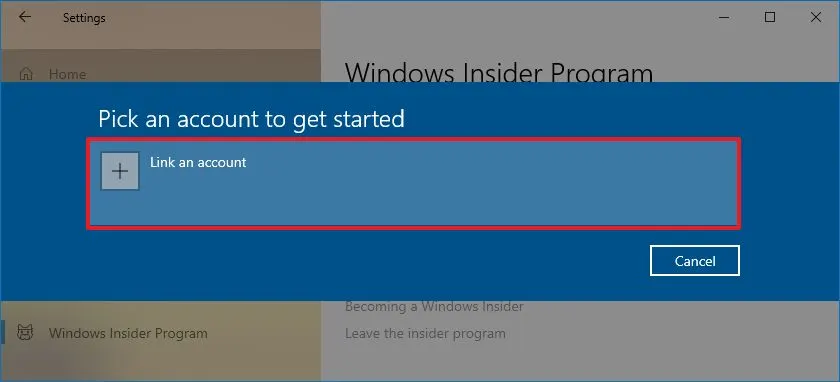
4. When the window opens up, choose the Link an account option.
5. Log in to your Microsoft account and hit Continue.
6. Then, choose Canary Channel or Dev Channel under the Pick your Insider Settings section.
7. Now, press Confirm to move forward with the process to upgrade from Windows 10 to Windows 11 and then the Confirm button for the terms and conditions section.
8. Hit Restart.
9. When the computer reboots, open Settings again.
10. Move towards the Update & Security section.
11. Choose the Windows Update option and hit Check for Updates.

12. Press Restart.
Completing these steps will update the Windows automatically if your device meets the requirements. It is also easy to remove the device from the Windows Insider Program. You just have to click on the Stop Getting Preview Builds option.
Note: Get working hacks to fix audio not working in Windows 10.
Brief Points
If you are still looking for a way to update Windows 10 to Windows 11, this is the guide for you. All the methods using which you can get your Windows updated are mentioned here. Since a few operations of Microsoft don’t work, you can find alternate options.
Make sure your computer meets the mentioned requirements for certain methods. If not, skip to the alternate one and upgrade your Windows. All the techniques here are simple to understand.

