Overview: Learning how to fix hard drive problems in Windows 11 can be a task for some people. Here, we are going to explain the easiest methods to help those who are not into technical aspects. These are some of the common errors in Windows 10 or 11. We are going to learn about the errors usually faced by Windows 11 users.
While using Windows 11, users are bound to face errors in the hard disk. Major problems that they face are in relations to external hard drive or solid-state drives (SSD).
And they search for solutions to repair hard disk errors such as not being able to upgrade to a new version, or the drive disappears, etc.
A lot of users have also reported issues while accessing their hard drives. Since Windows 11 are still under testing, it is definitely not free from glitches or bugs.
Sometimes, the users notice that Windows 11 does not even recognize the hard disk. Some say that there appear errors while accessing file explorer for specific drives.
In case you are facing similar issues, here are the fixes for them.
List of Techniques on How to Fix Hard Drive Problems in Windows 11
You can use 3 methods for resolving all these errors. These methods are:
- Using the Error-Checking Utility
- Running Check Disk
- Using PowerShell Cmdlet
Facing such errors is common and fortunately, these errors are fixable as long as they are not related to hardware errors.
If so, it may not be fixable using these methods and you might have to replace the hardware. All of the methods that we are going to explain to repair hard disk errors are pretty easy for those who are non-tech savvies.
Let’s go through these techniques now!
Technique 1 – Trying to Fix the Errors by Using the Error-Checking Utility
There is an error checking utility provided by Windows which can check and repair these errors. It will check the file system errors to resolve problems where the drive is taking a long time to open or is showing errors while accessing it.
Here are the steps:
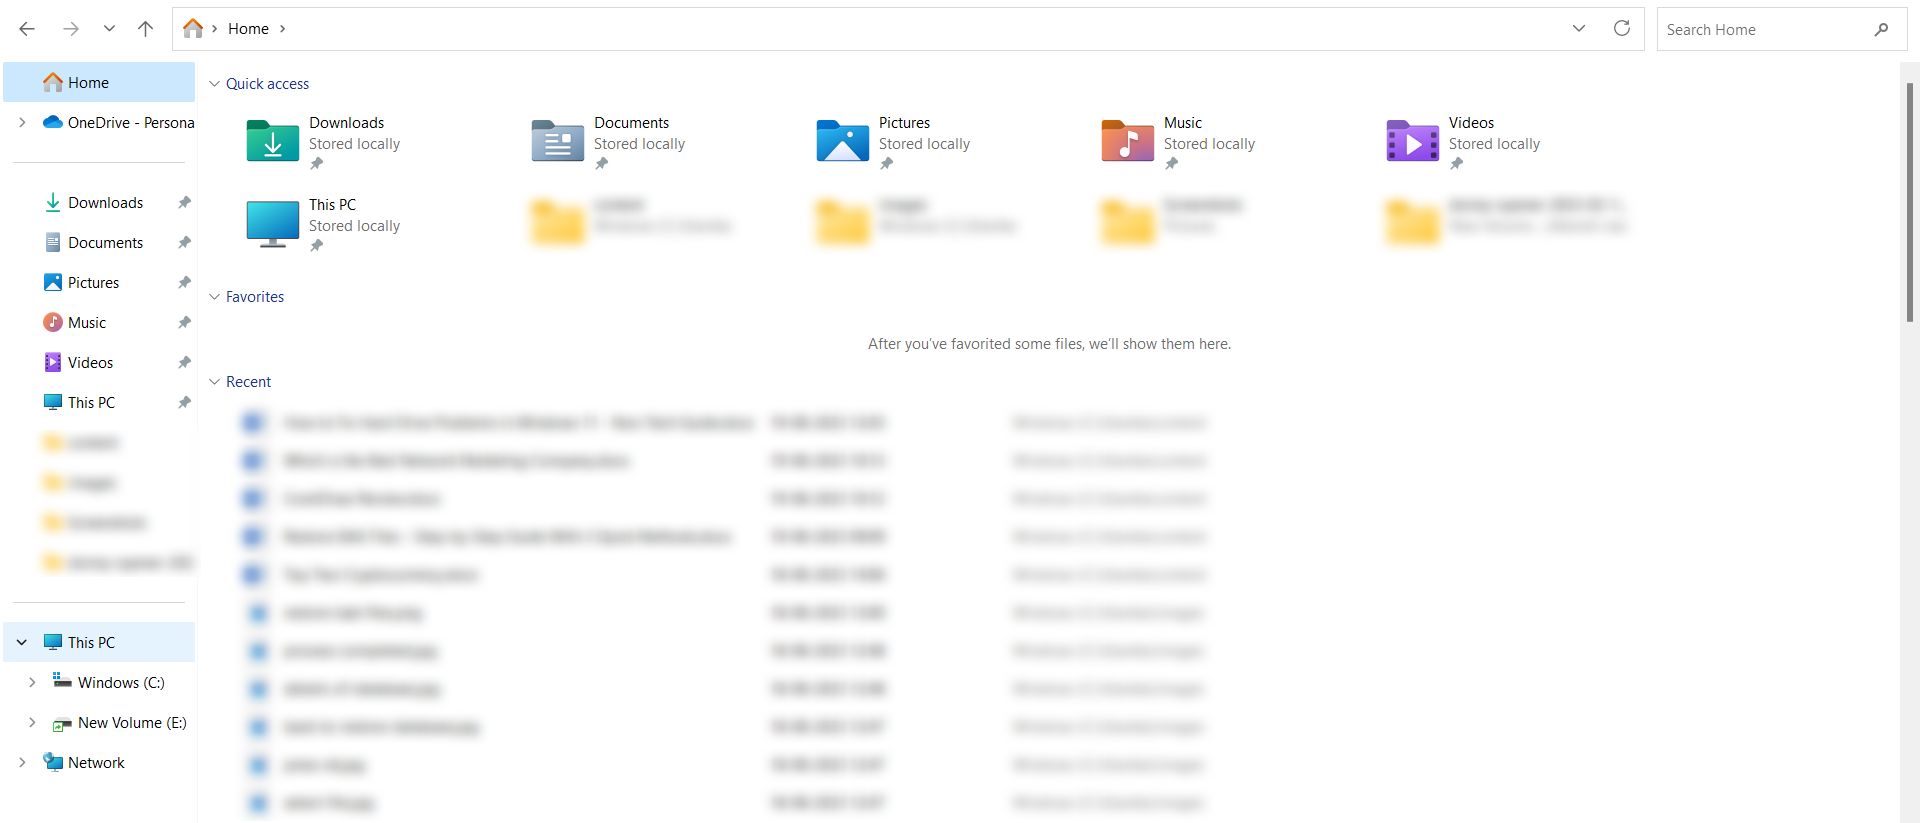
1. Go to the File Explorer and click on This PC from the left panel to start the process on how to fix hard drive problems in Windows 11.
2. Choose the drive you are facing the issues with and right-click on it. Select Properties from the menu.
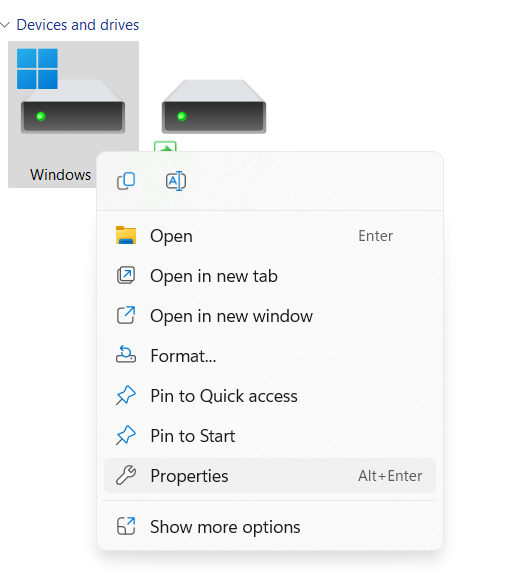
3. Now, go to the Tools tab in the window that appears. Click on the Check button under the Error Checking section.
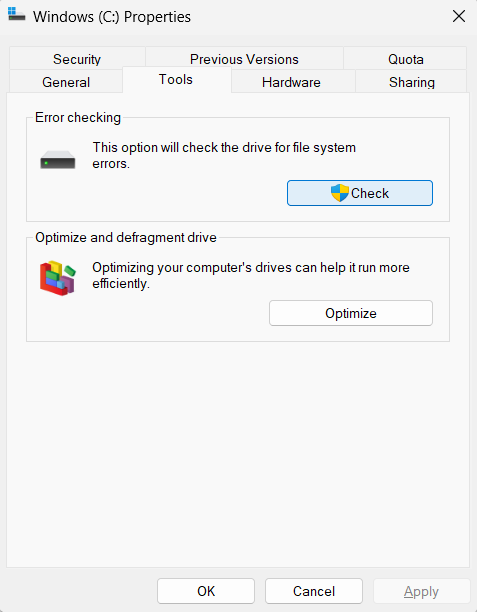
4. Select Scan Drive option from the pop-up.
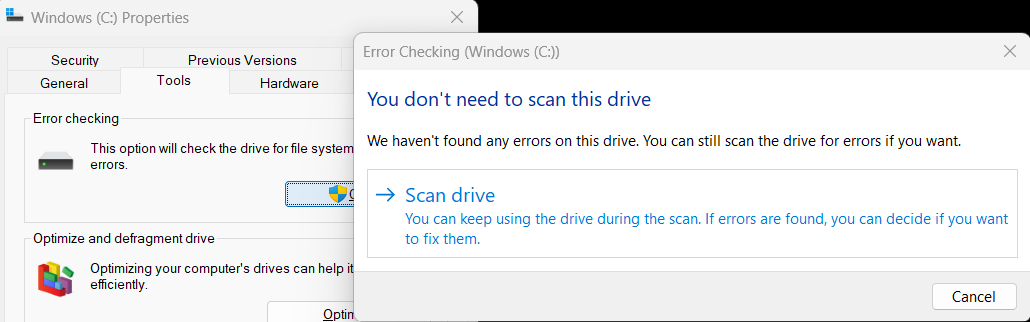
Now, wait for the scan to complete. If there are any errors found, the utility will solve them automatically.
Try to access the drive, restart the computer and try. If you still see the error, move to the next method.
Technique 2 – Running Check Disk Using Command Prompt to Repair Hard Disk Errors
The Check Disk utility can resolve the errors. Let’s start with the method:
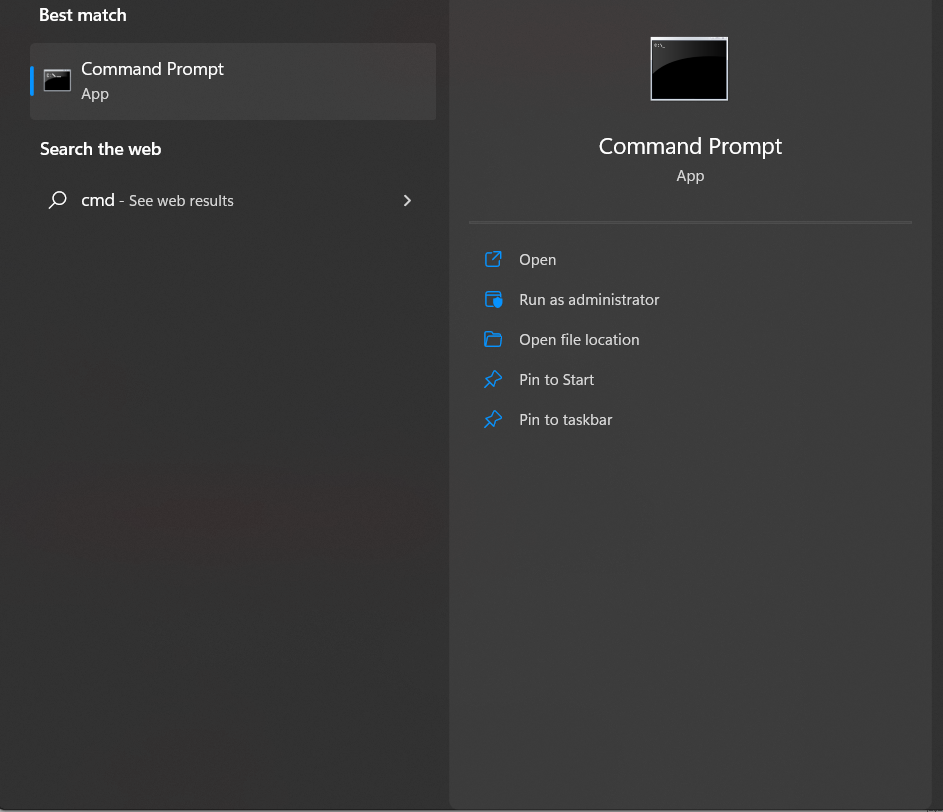
1. Enter cmd in the Search field and choose Run as Administrator option to open the Command Prompt.
2. Here, you have to run the command chkdsk /f c: and hit the Enter key. You can replace c with the letter of the drive you want to check.
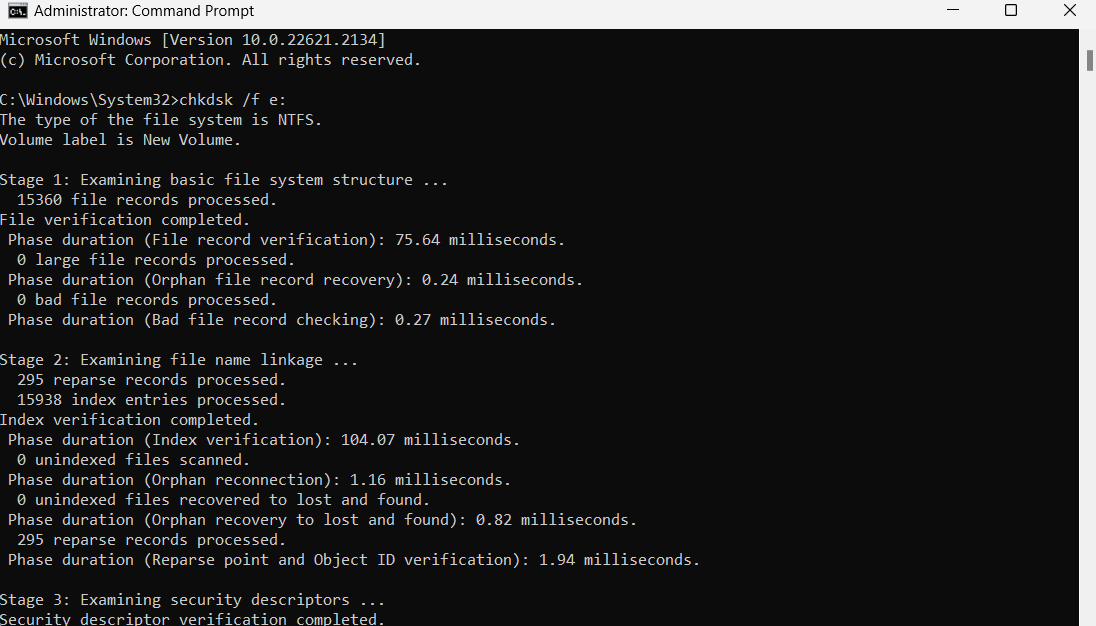
3. To fix the bad sectors, run the command: chkdsk /r c: and press Enter.
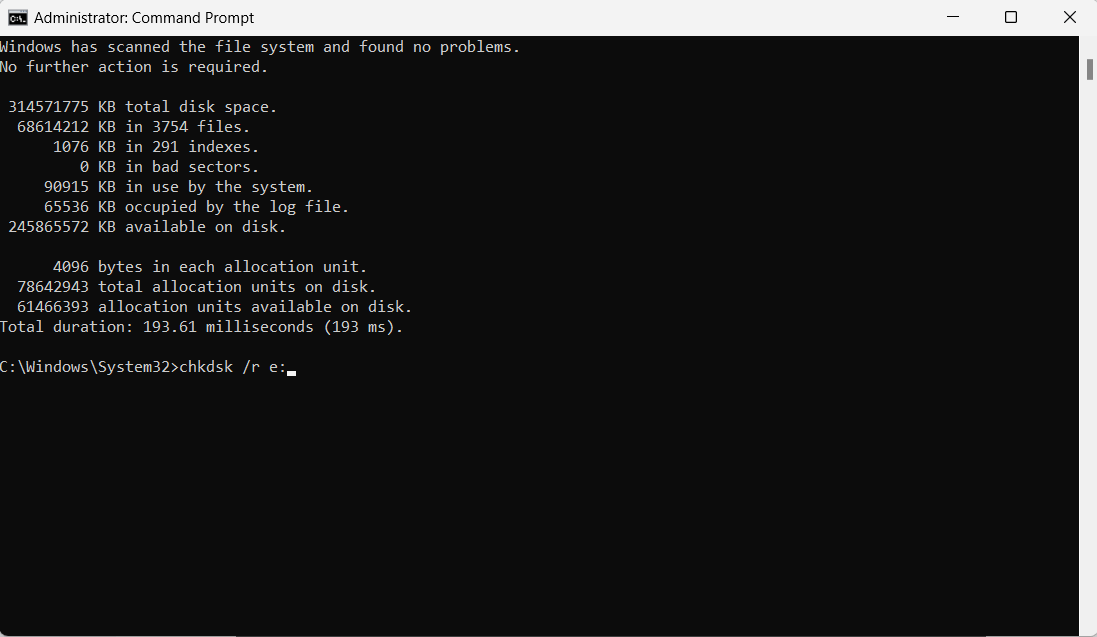
This will resolve any problem found while checking the disk.
Technique 3 – Using PowerShell to Learn How to Fix Hard Drive Problems in Windows 11
Using PowerShell can also help you with resolving these errors. Check out how:
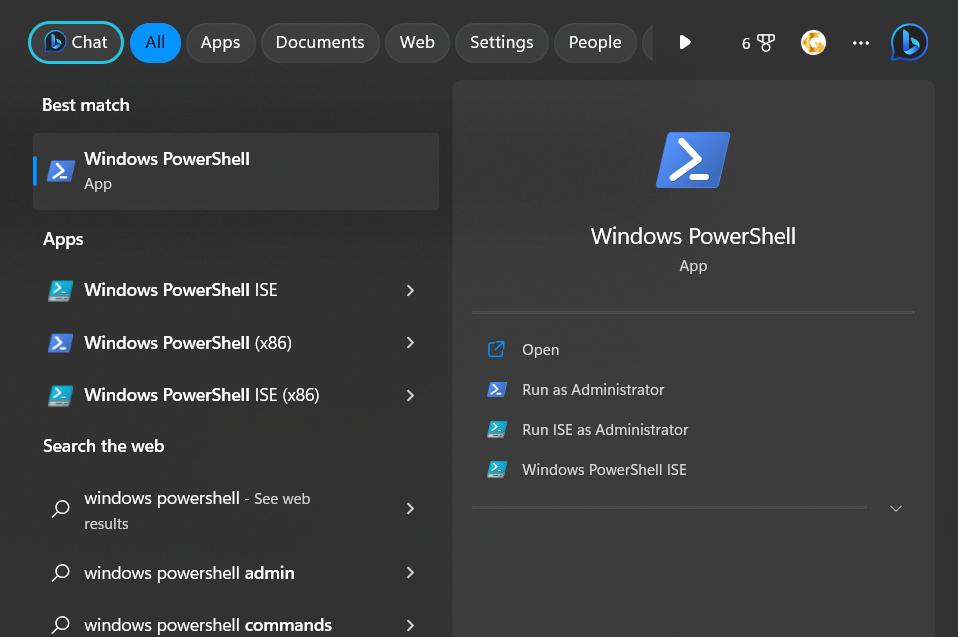
1. Go to the Search bar and enter Windows PowerShell.
2. Open Windows PowerShell by choosing the Run as Administrator option on the right panel.
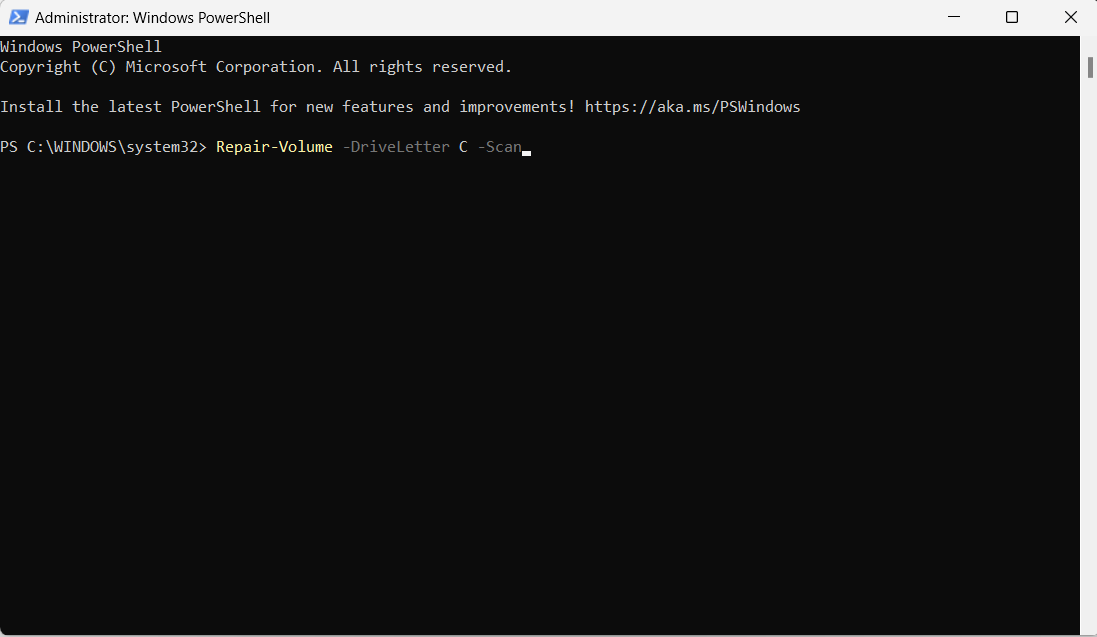
3. Now, enter the following command:
Repair-Volume -DriveLetter C -Scan
Note: If you want to change the drive letter, you can do so as per the drive you want to repair.
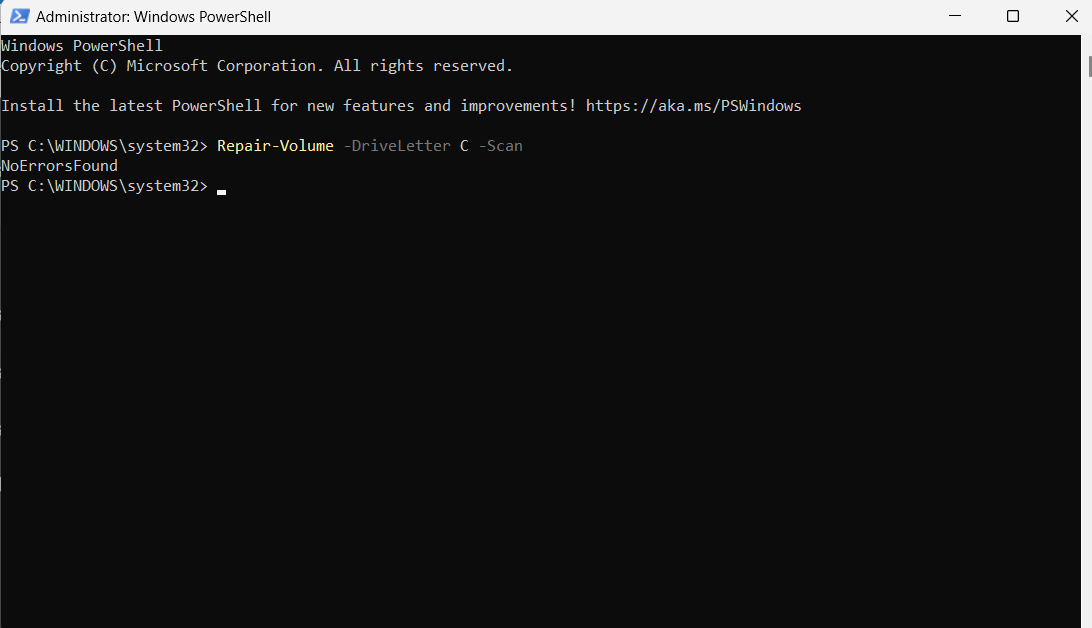
4. If there are no errors, the NoErrorsFound message will appear.
5. After that, you can type this command:
Repair-Volume -DriveLetter C -SpotFix
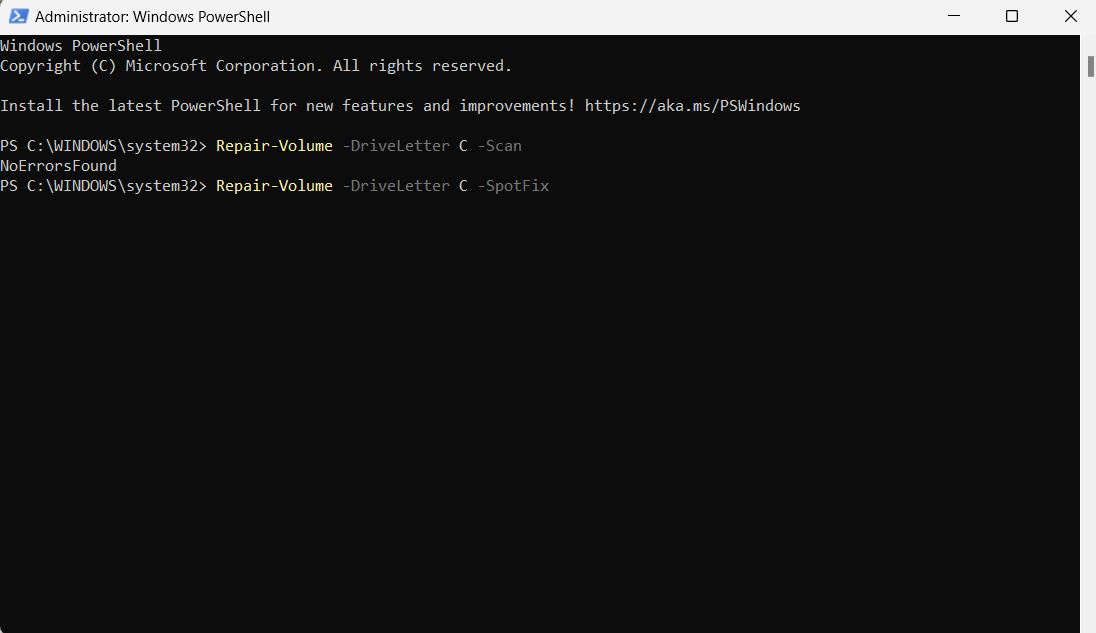
To repair hard disk errors, change the drive letter to your drive.
This is all that you have to do and the errors will be solved.
Extra Information on How to Solve These Errors
If you think that none of these methods are helping you, which technically they should. You can look for certain tools to help you.
There are multiple tools available out there for solving these errors. Surf the internet for third-party apps that are known to resolve the issues.
Or, if you want, you can also defragment your hard disk to learn how to fix hard drive problems in Windows 11.
For that, you can simply open the Defragment and Optimizing Drives utility. The, select the drive you are having issues with and click on the Optimize button.
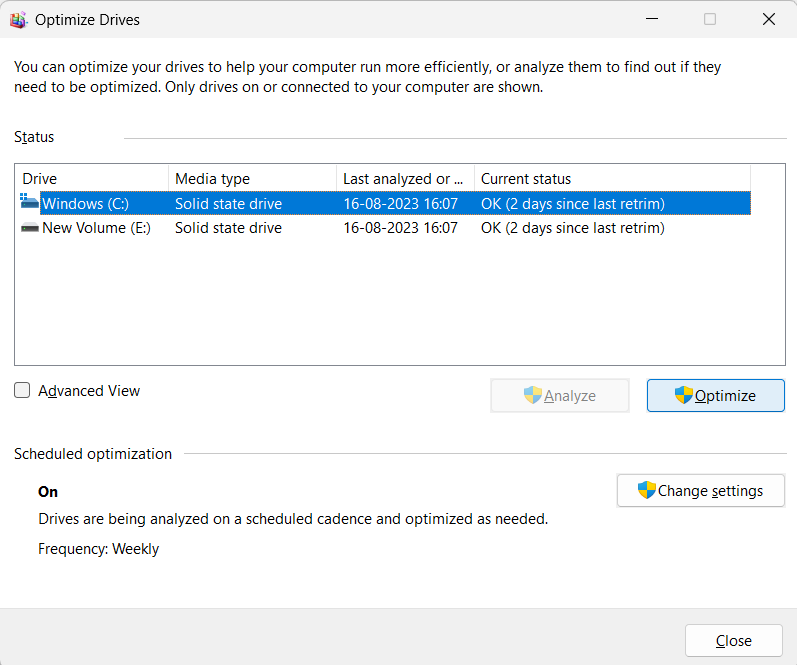
When that is done, you just have to restart your pc and the problem will be resolved.
In case you believe that the issues are in the hardware, replace them. If they are in the warranty period, you can get it fixed or replaced from a local service center.
Wrapping Things Up
Usually, people find errors in the hard drive as Windows 11 are still under the testing phase. It is not something to panic about as these are fixable by learning how to fix hard drive problems in Windows 11. Thus, we have provided all the possible methods to help you out.
Go through these techniques before jumping onto other solutions such as the third-party tools. You may not be able to find a tool that can surely resolve the error and not make a mess.